Hello Guys,
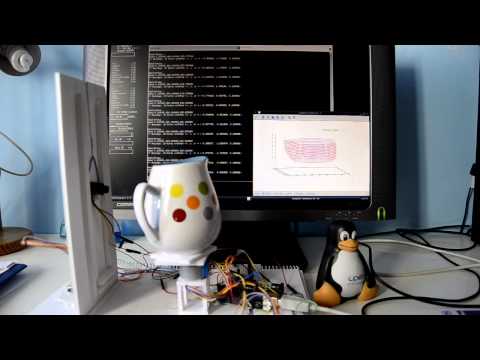
i am trying to make a processing app which will give me 3d plot circular for the value i get from serial port.
The x,y,z values are received from serial port and in plot in 3d area in circular shape.
similar to this video:-
 request help for the same
↧
3d plot
↧
2.2.1 - Loop preventing draw window from displaying anything
Hey folks!
I have something that used to work when it was running inside of a serial event _(mostly not my code, I think it was on Adafruit):
void serialEvent( Serial myPort) {
  //put the incoming data into a String -
  //the '\n' is our end delimiter indicating the end of a complete packet
  val = myPort.readStringUntil('\n');
  //make sure our data isn't empty before continuing
  if (val != null) {
    //trim whitespace and formatting characters (like carriage return)
    val = trim(val);
    println(val);

    //look for our 'A' string to start the handshake
    //if it's there, clear the buffer, and send a request for data
    if (firstContact == false) {
      if (val.equals("A")) {
        myPort.clear();
        firstContact = true;
        myPort.write("A");
        println("contact");
        fetchTweets();
      }
    } else { //if we've already established contact, keep getting and parsing data
      println(val);

      // ***These four lines are the only lines I added***
      // newNumber ensures that we don’t parse a tweet until we have one
      if (newNumber == true) {
        drawTweets();
      }

     // when you've parsed the data you have, ask for more:
      myPort.write("A");

    }
  }
}
....but Processing would occasionally throw Serial errors, and it was pointed out to me that I was sending AND receiving to/from my Arduino, but all I really needed to do was send. I found some code from Dana Moser (http://www.curiousart.org/electronic2/code/34_Serial_Send_Arduino.html) which works a treat for sending.... but now I can’t put drawTweets(); in a Serial event and it seems that if I put it in the draw loop I get a blank screen (presumably because it’s working on sending all of the data I have to the Arduino until it draws the screen.
Even when I wrap it in the 'if' statement -- and immediately set newNumber to false -- no luck.
Any thoughts? Thanks!
↧
↧
How to transform String in float : float value = float(cm); ? Help
Hi everyone,
Currently I make a project for learn how to discuss between sensor and processing. So Processing read correctly the port of arduino ( I can see the value with processing)
My problem it's a cannot use this data for make something ( example I want to hide or show like influenced the opacity of an picture). For influenced the opacity I use a white rect but maybe is not a good idea.
Because ( maybe) I've string informations and for make a "if" I use a float . I search differents things but i'm lost with the differents method to are not very clear. I search to transform "cm" in float var1 for use my if. After I thinking to make a map for transform the data.
        // the code with proximity sensor and "cm" like string value.


        import cc.arduino.*;
        import org.firmata.*;
        import processing.serial.*;

        Serial myPort;
        String cm;
        float var1;
         PImage fonds;


        void setup() {

           size(displayWidth, displayHeight); //full screen
          println(Serial.list());
          myPort = new Serial(this, Serial.list()[6], 9600);  // go to read the COM of arduino
         myPort.bufferUntil('\n');
          fonds = loadImage("testu.jpg");
           image(fonds, 0, 0,displayWidth,displayHeight);

        }

        void draw() {


        while (myPort.available() > 0) { //Continue usb serial
            String cm = myPort.readStringUntil('\n'); // Read port analog
            if(cm!=null) {
             cm = trim(cm);

              float var1 = float(cm); // The problem is here how to transform this value

               var1 = map (var1, 0, 700, 0, 255);
            println(cm); // affichage
            println(var1);

            }
        }
        if (var1 > 100){                 // currently he don't read this part
         noStroke();
         fill(255,0);
        rect(0, 0,displayWidth,displayHeight);
        smooth();
        }

        else {
           noStroke();
         fill(255,10);
        rect(0, 0,displayWidth,displayHeight);
        smooth();
        }

        }
Sorry for my english if i make some mistake. Thank's Kinds regards
↧
MAC Problem: serial port /dev/cu.iphone-wirelessiAP; port busy
I have this problem with processing: serial port /dev/cu.iphone-wirelessiAP; port busy First i have no Iphone. I use 10"9 on macbook pro mid 2010. I am able to upload the skecth with arduino with no problem. It was working find last time i have try the sketch.
It thing i have update the java plugin and firefox maybe it related to that.
How can i fix it ?
↧
Why does "PROCESSING 3" keeps closing as soon as I run the program.
All other programs run on my new windows 8.1 computer but "PROCESSING 3". I can't seem to find any solution to this problem. I have been searching the internet for a while but there doesn't seem to be much information about this program. I became aware of this program in Jeremy Blum's book: EXPLORING ARDUINO. There is a link to this website in his book on page 128. As soon as I downloaded, and installed the program several weeks ago I have been trying to find a solution to this anomaly. Normally I am able to solve most problems like this because there is a lot of links and information about a given product and/or software program. I'm finding very little information on the internet concerning "PROCESSING 3". QUESTION: Is there somebody in this forum who has had a similar problem with this program, and who has solved this particular issue. THANKS; dmenefee
↧
↧
orientation a Ardunio robot with position information from a camera.
Hello everybody
My name is Benjamin and I m a swiss student. Sorry for my english. :) (wehn my english isn t clear, ask my) But i hope I get more information from you.
I have a projekt how I want drive with up to 5 Arduino robot in a room.
My idea was that I measure the strength of signals, but they dont working, I dont tell you why because I don`t want bored you with my english ;)
My Idea was that I hang a camera at the ceiling (from room). But I haven`t any experience with processing. So I think that I will lay a grid on the image of the camera . So as a coordinate system. Then I will recognize the robots position and send with a serial port the information to a Arduio.
Please answert for my, as a chrismas gift, in a easy english. Wehn you have time and mood, will you write my the surce code? :)
Merry Christmas
greatings Benjamin
↧
How to use keyboard shortcuts
Hi, how do you use keyboard shortcut like Ctrl+S to save a document.
Thanks
↧
How do I get controlP5 generated knob in Processing to change values in Arduino code?
Background: I am working on a electric brewing project using an Arduino Uno R3, two DS18b20 digital temp sensors and Processing IDE. I am using the sensors to monitor and control two separate heating elements on SSRs for various steps in beer brewing. I have successfully used the following Arduino and Processing code to send serial data to Processing to generate a dumb temp output GUI showing two separate temps (ACTUAL1,2), relay set points (SETPOINT1,2) and relay states (HEATPIN1,2).
Problem: The control knob generated with the controlP5 library is in the Processing sketch as you will see below but I am asking for help getting it to communicate back to Arduino. I may be going about this all wrong dataflow wise: Arduino to serial to Processing...back to serial? back to Arduino? I tried to scrap most of the Arduino code and use Firmata but I still need to code in the Dallas sensors into Arduino. Any suggestions would be greatly appreciated, very new to coding, I have the brewing process, hardware and wiring down but lack experience with code. Thank you in advance.
Arduino Code:
//#include <Boards.h>
//#include <Firmata.h>

#include <OneWire.h>
#include <DallasTemperature.h>
int ACTUAL1;
int ACTUAL2;
int SETPOINT1 = 145;
int SETPOINT2 = 150;
int HEATPIN1 = 13;
int HEATPIN2 = 12;
#define ONE_WIRE_BUS 3
OneWire oneWire(ONE_WIRE_BUS);
DallasTemperature sensors(&oneWire);
DeviceAddress Probe1 = { 0x28, 0xFF, 0x14, 0x23, 0x16, 0x15, 0x03, 0xB9 };
DeviceAddress Probe2 = { 0x28, 0xFF, 0xBA, 0x0D, 0x16, 0x15, 0x03, 0x4D };

void setup(void)
{
  pinMode(HEATPIN1, OUTPUT);
  pinMode(HEATPIN2, OUTPUT);
  Serial.begin(9600);
  sensors.begin();
  sensors.setResolution(Probe1, 10);
  sensors.setResolution(Probe2, 10);
}

void printTemperature(DeviceAddress deviceAddress)
{
  float TempC = sensors.getTempC(deviceAddress);
  if (TempC == -127.00) {
    Serial.print("Error getting temperature");
  } else {
    ACTUAL1 = (DallasTemperature::toFahrenheit(TempC));
    ACTUAL2 = (DallasTemperature::toFahrenheit(TempC));
    Serial.print(ACTUAL1);
    //Serial.print(ACTUAL2);
  }
}

void loop(void)
{
  delay(2000);
  sensors.requestTemperatures();

  //Serial.read();
  //SETPOINT1 = Serial.parseInt();

  printTemperature(Probe1);
  if (ACTUAL1 < 100) {
    Serial.print(" ");
  }
  Serial.print(",");
  Serial.print(SETPOINT1);
  if (SETPOINT1 < 100) {
    Serial.print(" ");
  }
  if (ACTUAL1 >= SETPOINT1)
  {
    Serial.print ("OFF");
    digitalWrite(HEATPIN1, LOW);
  }
  else
  {
    Serial.print ("ON ");
    digitalWrite(HEATPIN1, HIGH);
  }

  printTemperature(Probe2);
  if (ACTUAL2 < 100) {
    Serial.print(" ");
  }
  Serial.print(SETPOINT2);
  if (SETPOINT2 < 100) {
    Serial.print(" ");
  }
  if (ACTUAL2 >= SETPOINT2)
  {
    Serial.print ("OFF.");
    digitalWrite(HEATPIN2, LOW);
  }
  else
  {
    Serial.print ("ON .");
    digitalWrite(HEATPIN2, HIGH);
  }
}
Processing Code:
import controlP5.*;
ControlP5 cp5;
Knob myKnobA;
Knob myKnobB;

import processing.serial.*;
Serial port;
String ACTUAL1 = "";
String ACTUAL2 = "";
String SETPOINT1 = "";
String SETPOINT2 = "";
String HEATPIN1 = "";
String HEATPIN2 = "";
String data = "";
int index = 0;
PFont font;


void setup()
{

  smooth();
  noStroke();
  cp5 = new ControlP5(this);
  myKnobA = cp5.addKnob("SETPOINT 1")
    .setRange(50, 215)
      .setValue(50)
        .setPosition(50, 350)
          .setRadius(50)
            .setNumberOfTickMarks(33)
              .setTickMarkLength(10)
                .snapToTickMarks(true)
                  .setColorForeground(color(255))
                    .setColorBackground(color(0, 160, 100))
                      .setColorActive(color(255, 255, 0))
                        .setDragDirection(Knob.VERTICAL)
                          ;
  myKnobB = cp5.addKnob("SETPOINT 2")
    .setRange(50, 215)
      .setValue(50)
        .setPosition(200, 350)
          .setRadius(50)
            .setNumberOfTickMarks(33)
              .setTickMarkLength(10)
                .snapToTickMarks(true)
                  .setColorForeground(color(255))
                    .setColorBackground(color(0, 160, 100))
                      .setColorActive(color(255, 255, 0))
                        .setDragDirection(Knob.VERTICAL)
                          ;

  size(360, 500);
  port = new Serial(this, "COM4", 9600);
  port.bufferUntil('.');
  font = loadFont("AgencyFB-Bold-200.vlw");
  textFont(font, 100);
}

void draw()
{


  background(0, 0, 0);
  fill(46, 209, 2);
  text(ACTUAL1, 50, 100);
  fill(0, 102, 153);
  text(SETPOINT1, 50, 200);
  fill(50, 2, 100);
  text(HEATPIN1, 50, 300);

  fill(46, 209, 2);
  text(ACTUAL2, 200, 100);
  fill(0, 102, 153);
  text(SETPOINT2, 200, 200);
  fill(50, 2, 100);
  text(HEATPIN2, 200, 300);

  float S1;
  S1 = (myKnobA.getValue());
  println(S1);
}

void keyPressed() {
  switch(key) {
    case('1'):
    myKnobA.setValue(50);
    break;
    case('2'):
    myKnobA.setValue(215);
    break;
    case('3'):
    myKnobB.setValue(50);
    break;
    case('4'):
    myKnobB.setValue(215);
    break;
  }
}

void serialEvent (Serial port)
{
  data = port.readStringUntil('.');
  data = data.substring(0, data.length() - 1);
  index = data.indexOf(",");

  ACTUAL1 = data.substring(0, data.length() - 16);
  SETPOINT1 = data.substring(index+1, data.length() - 12);
  HEATPIN1 = data.substring(index+4, data.length() - 9);

  ACTUAL2 = data.substring(index+7, data.length() - 6);
  SETPOINT2 = data.substring(index+10, data.length() - 3);
  HEATPIN2 = data.substring(index+13, data.length());
}
↧
Bluetooth slider: Recieve serial bytes and if a particular char is recieved jump to function..?
I have a project in processsing Bluetooth and Arduino . On processing of trying to achieve communication with slider To perform the conversion I am inspired by MUBASE :
http://forum.arduino.cc/index.php?topic=194804.10;wap2
void COMMANDE( int valeur) { // fonction évènement Slider de meme nom - reçoit la valeur
byte[] a= intToByteArray(valeur); // excellent function for converting int to byte array (byte[]) which is what the Ketai bluetooth
//library sends.
byte[] b={'q'}; // sending the 'q' character as a byte[]
bt.broadcast(b); // send identifier character
bt.broadcast(a); // send (broadcast) the bluetooth slider info
println("Evènement Slider PWM avec valeur = "+valeur); // message console Processing - debug
delay(10); // entre 2 prises en compte }
but intToByteArray () method ; It does not work and the error code is:
- ERROR in D:\DOCUME~1\ssi\LOCALS~1\Temp\android3016120574738694448sketch\src\processing\test\bprogboutonandprocfw\bprogBoutonAndProcfw.java (at line 150)
byte[] a= intToByteArray(valeur); // excellent function for converting int to byte array (byte[]) which is what the Ketai bluetooth
^^^^^^^^^^^^^^
The method intToByteArray(int) is undefined for the type bprogBoutonAndProcfw
1 problem (1 error) BUILD FAILED D:\DOCUME~1\ssi\LOCALS~1\Temp\android3016120574738694448sketch\build.xml:15: The following error occurred while executing this line: D:\DOCUME~1\ssi\LOCALS~1\Temp\android3016120574738694448sketch\build.xml:28: Compile failed; see the compiler error output for details.
Total time: 1 second Someone would he an idea? Thanks.
↧
↧
How to average?
Hi, I'm completely new to all this and am now lost on how to 'average' my sequence. I have a sequence in png format of the horizon, arduino and an IR sensor. When you walk closer to the sensor the horizon should get bigger and walk away it should eventually just be a thin white line. My problem is that as you walk towards it, the sequence starts to flicker and it also is not completing the sequence. It only goes to about 60% of the walk even though I am standing right in front of it. How do I smooth it out so it transitions from image to image? Thanks for any advice at all you may have :)
CODE:
import processing.serial.*;
import cc.arduino.*;
Arduino arduino;
PImage img[] = new PImage[225];
void setup() { size(1280, 800); smooth(2);
// Prints out the available serial ports. println(Arduino.list());
arduino = new Arduino(this, "COM6", 1500);
for (int i = 0; i < img.length; i++) {
String sa = nf(i, 3);
img[i] = loadImage("horizon_00"+sa+".png");
} }
void draw() { int sensorValue = arduino.analogRead(0);
if (sensorValue > 260 && sensorValue < 630) { int keyFrame = int(map(sensorValue, 260, 630, 0, 224));
println(sensorValue + " " + keyFrame );

image(img[keyFrame], 0, 0);
} }
↧
Control de humedad, temperatura y presión desde PC con Processing
Hola. Necesito hacer un fichero txt con los datos que mide un circuito arduino. Por ello he pensado en hacer una pequeña aplicación para ejecutarla desde un pc con processing. El tema es que necesito medir la humedad relativa y la temperatura por un lado, y la presión por otro lado, y recoger los datos en un fichero de texto de un ordenador. Es evidente que necesito que se esté midiendo de forma contínua cada cierto tiempo para recoger un número de datos significativo para el estudio que debo hacer en un trabajo académico.
Aunque he estudiado programación en PASCAL hace ya algún tiempo, mis conocimientos de programación están bastante obsoletos, por lo cual el contacto con el JAVA y PROCESSING me está costando mucho trabajo.
Estudiando un poco por aquí y por allí he logrado hacer un código para un programa, pero me da problemas. Y quisiera preguntar si alguno puede ayudarme en este proyecto, que imagino para algunos será relativamente fácil.
El código que he logrado hacer es el siguiente:
import processing.serial.*; //Importamos la librería Serial
Serial port; //Nombre del puerto serie
PrintWriter output; //Para crear el archivo de texto donde guardar los datos
float valorP;//Valor de la presión
float valorH;//Valor de la humedad relativa
float valorT;//Valor de la Temperatura
int index=0;
{ println(Serial.list()); //Visualiza los puertos serie disponibles en la consola de abajo port = new Serial(this, Serial.list()[1], 9600); //Abre el puerto serie COM3
output = createWriter("Parametros_datos.txt"); //Creamos el archivo de texto, que es guardado en la carpeta del programa
size(800, 400); //Creamos una ventana de 800 píxeles de anchura por 600 píxeles de altura }
void setup() { port.write("p"); //Envia una "p" para que el Arduino lea la presión }
{ //Recibir datos presión del Arduino if(port.available() > 0) // si hay algún dato disponible en el puerto { valorP=port.read();//Lee el dato y lo almacena en la variable "valorP" }
//Visualizamos la presión con un texto text("Presión =",390,200); text(valorP, 520, 200); text(" hPa",547,200);
//Escribimos los datos de la presión con el tiempo (h/m/s) en el archivo de texto output.print(valorP + " hPa "); output.print(hour( )+":"); output.print(minute( )+":"); output.println(second( )); output.println("");
}
{ port.write("h"); //Envia una "h" para que el Arduino lea la humedad y la temperatura
}
void draw()
{ //Recibir datos de Temperatura y Humedad del Arduino if(port.available() > 0) // si hay algún dato disponible en el puerto
{
//Leemos hasta que se encuentre un espacio y guardamos lo leido en Data Data = port.readStringUntil(" "); //buscamos la posición del espacio que separa //los dos valores y guardamos la posición en index index = Data.indexOf(" ");
//almacenamos la primera parte del texto en valorH valorH= Data.substring(0,index); //Almacenamos la segunda parte en valorT valorT= Data.substring(index+1,Data.length()); } } { valor=port.read();//Lee el dato y lo almacena en la variable "valorH" } //Visualizamos la humedad y la temperatura con un texto text("Humedad = ", 390, 300); [color=green] text(valorH, 520, 300); text(" % ", 547, 300); text("Temperatura = ", 630, 300); text(valorT, 520, 547); text(" ºC ", 547, 300);[/color] } { //Escribimos los datos de la temperatura y la humedad con el tiempo (h/m/s) en el archivo de texto output.print(valorHT + " % ºC "); output.print(hour( )+":"); output.print(minute( )+":"); output.println(second( )); output.println("");
}
void keyPressed() //Cuando se pulsa una tecla {
} { //Pulsar la tecla E para salir del programa if(key=='e' || key=='E')
{ output.flush(); // Escribe los datos restantes en el archivo output.close(); // Final del archivo exit();//Salimos del programa } }
Pero no se si está bien porque me da varios errores. Si alguien pudiese echar un vistazo a ver qué está mal, me sería de gran ayuda. Muchas gracias.
↧
How to change the volume of audio whilst playing
So I have a code which goes through Processing into Arduino. It controls an LED and makes it pulsate like a heartbeat. What I want to achieve is the WhiteNoise increasing and decreasing in volume at the same time as the brightness of the LED gets brighter and dimmer.
Here is the code:
import processing.serial.*;
import cc.arduino.*;
Arduino arduino;
import processing.sound.*;
WhiteNoise noise;

int ledPin = 9;

void setup()
{
  //println(Arduino.list());
  arduino = new Arduino(this, "/dev/cu.usbmodem1411", 57600);
  arduino.pinMode(ledPin, Arduino.OUTPUT);

  size(640, 360);
  background(255);

  // Create the noise generator
  noise = new WhiteNoise(this);
  noise.play();
  noise.amp(0.5);
}


void draw()

{  // fade in from min to max in increments of 5 points:
  for(int fadeValue = 0 ; fadeValue <= 255; fadeValue +=5) {
    // sets the value (range from 0 to 255):
    arduino.analogWrite(ledPin, fadeValue);
    // wait for 20 milliseconds to see the dimming effect
    delay(20);
  }

  delay(1000);
  arduino.analogWrite(ledPin, 0);
  delay (80);
  arduino.analogWrite(ledPin, 255);
  delay (100);
  arduino.analogWrite(ledPin, 0);
  delay (80);
  arduino.analogWrite(ledPin, 255);

  // fade out from not-quite-max to min in increments of 5 points:
  for(int fadeValue = 200 ; fadeValue >= 0; fadeValue -=random(2,20)) {
    // sets the value (range from 0 to 200):
    arduino.analogWrite(ledPin, fadeValue);
    // wait for 30 milliseconds to see the dimming effect
    delay(30);
  }
}
So at the moment, all that happens is that the LED performs as I want it to perform, but the WhiteNoise just plays solidly.
I think I could achieve the dip and rise in volume using the timing of the delays. However, so far, I have not been able to achieve volume changing at all.
Any help appreciated. Thank you.
↧
Processing GUI to Control Arduino PWM Electromagnetic Actuators
My name is Eric. I am a scientist (nanotech) and inventor, but definitely not skilled at programming. I am building a small scientific instrument (a molecular printer) that uses electromagnetic actuators to move a tiny print head in X,Y and Z. Low cost, user friendliness, and open source are primary considerations. I am currently using Processing and G4P to create a GUI that sends instructions to an Arduino to send PWM signals to the actuators. As a non-programmer I have been trying to learn as much as I can about interfacing GUI elements, processing code and arduino code with the hardware. I am stuck at the two points (below) and seek any tutorials, solutions, or other pointers.
Where can I learn how to generate the code that will respond to a G4P (or other graphical element) slider by sending serial instructions to modulate the PWM output from the Arduino? I've manage to create on/off buttons (HIGH/LOW) but not the continuous data code that can be inserted into a Processing sketch.
Where can I learn how to code a GUI element (e.g., button) that, when activated, will initiate a subroutine within an Arduino sketch? (actually, I need to better understand how to make and identify subroutines and make them run just once).
Thanks in advance for any advice, pointers, URLs etc.!
↧
↧
Heart Beat triggers Processing rotation (interactive clock)
Hi everyone! This is my first discussion so please don't kill me right away :D I've been importing a couple of libraries, reading / watching some tutorials.. However for this very topic I thought it's best to ask you guys right away:
This is my (processing) code so far:
 PImage second;
 PImage minute;
 PImage background;
 float rot=0;

 void setup() {
  size(1000, 1000);
  second = loadImage("second hand.png");
  minute = loadImage("minute hand.png");
   background = loadImage("background.png");
 }
 void draw() {
   background(background);
   translate(width/2, height/2);
  rotate(rot);
   image(second, -second.width/2, -second.height/2);
 }
 void mouseClicked() { //event is triggered by clicking
   rot+=PI/30;  //second hand is rotated by 6 degrees
 }
Now as you can see the second hand is rotated by 6 degrees - triggered by a mouse-click. However I'd like to combine this rotation with a heart-beat-sensor. Here's its code (Pulse Sensor Amped 1.4 by Joel Murphy and Yury Gitman):
 int pulsePin = 0;                 // Pulse Sensor purple wire connected to analog pin 0
 int blinkPin = 13;                // pin to blink led at each beat
 int fadePin = 5;                  // pin to do fancy classy fading blink at each beat
 int fadeRate = 0;                 // used to fade LED on with PWM on fadePin

 volatile int BPM;                   // used to hold the pulse rate
 volatile int Signal;                // holds the incoming raw data
 volatile int IBI = 600;             // holds the time between beats, the Inter-Beat Interval
 volatile boolean Pulse = false;     // true when pulse wave is high, false when it's low
 volatile boolean QS = false;        // becomes true when Arduoino finds a beat.

 void setup(){
   pinMode(blinkPin,OUTPUT);         // pin that will blink to your heartbeat!
   pinMode(fadePin,OUTPUT);          // pin that will fade to your heartbeat!
   Serial.begin(115200);             // we agree to talk fast!
   interruptSetup();                 // sets up to read Pulse Sensor signal every 2mS
    // UN-COMMENT THE NEXT LINE IF YOU ARE POWERING The Pulse Sensor AT LOW VOLTAGE,
    // AND APPLY THAT VOLTAGE TO THE A-REF PIN
    //analogReference(EXTERNAL);
 }

 void loop(){
   sendDataToProcessing('S', Signal);     // send Processing the raw Pulse Sensor data
   if (QS == true){                       // Quantified Self flag is true when arduino finds a heartbeat
         fadeRate = 255;                  // Set 'fadeRate' Variable to 255 to fade LED with pulse
         sendDataToProcessing('B',BPM);   // send heart rate with a 'B' prefix
         sendDataToProcessing('Q',IBI);   // send time between beats with a 'Q' prefix
         QS = false;                      // reset the Quantified Self flag for next time
      }
   ledFadeToBeat();
   delay(20);                             //  take a break
 }

 void ledFadeToBeat(){
     fadeRate -= 15;                         //  set LED fade value
     fadeRate = constrain(fadeRate,0,255);   //  keep LED fade value from going into negative numbers!
     analogWrite(fadePin,fadeRate);          //  fade LED
   }

 void sendDataToProcessing(char symbol, int data ){
     Serial.print(symbol);                // symbol prefix tells Processing what type of data is coming
     Serial.println(data);                // the data to send culminating in a carriage return
 }
Okay, so basically I'm interested in rotating my second hand on every heart beat. Can you guys help me out?
Cheers, Ap0
↧
Mic-in that controls MP3 playlist
I am working on a project:
When processing detects audio from mic-in at a certain decibel, it plays an audio file from the playlist. When you repeat the action, processing plays the 2nd audio file from the playlist. HELP PLEASE
↧
writer lost
↧
Why does my laptop not connect to my other laptop?
So I have this code, and it doesn't want to connect to my server file. It should be able to switch two LED's on and off..
Client:
import processing.net.*;
import processing.serial.*;
Client c;
Serial port;
int incomingbyte;
void setup() {
 c = new Client(this, "127.0.0.1", 12345);
 port = new Serial(this, Serial.list()[0], 9600);
}
void draw() {
 if (c.available()>0) {
     incomingbyte = c.read();
     port.write(incomingbyte);
     println(incomingbyte);
 }
}
Server:
import processing.net.*;
Server s;
void setup() {
 size(400,400);
 rectMode(RADIUS);
 s = new Server(this, 12345);
}
void draw() {
  background(0);
  if (mouseX > 0 && mouseX < 200 && mouseY > 0 && mouseY < 400) {
     fill(0,200,0);
     rect(0,0,200,400);
     s.write('H');
 }
 else{
 s.write("L");
 }
 if (mouseX > 200 && mouseX < 400 && mouseY > 0 && mouseY < 400) {
     fill(200,0,0);
     rect(300,0,100,400);
     s.write('K');
   }
 else {
     s.write('J');
   }
 if (mousePressed){
     s.write('H');
     s.write('K');
   }
}
Arduino:
const int ledPin = 8; // the pin that the LED is attached to
const int ledPin1 = 7;
int incomingByte;      // a variable to read incoming serial data into
void setup() {
  // initialize serial communication:
  Serial.begin(9600);
  // initialize the LED pin as an output:
  pinMode(ledPin, OUTPUT);
  pinMode(ledPin1, OUTPUT);
}
void loop() {
  // see if there's incoming serial data:
  if (Serial.available() > 0) {
    incomingByte = Serial.read();
    if (incomingByte == 'H') {
      digitalWrite(ledPin, HIGH);
    }
    if (incomingByte == 'L') {
      digitalWrite(ledPin, LOW);
    }
    if (incomingByte == 'K') {
      digitalWrite(ledPin1, HIGH);
    }
    if (incomingByte == 'J') {
      digitalWrite(ledPin1, LOW);
    }
  }
}
↧
↧
Reset serial buffer
Hello friends, i'm sorry about my english. I'm student and I'm working to a project with Arduino and Processing. I have an Arduino controller cabled with temperature ,humidiity and power sensor. I read the values with a processing screen. The program works to 5 o 6 days, next the buffer filling (i think) and the program stop. Could you give me an help please?
↧
Arduino Sensor Interfacing
Can any one suggest how to interface sensor to the arduino? I have the small project using sensors. I bought the beginner arduino kit from this site.
↧
How can i translate the arduino line to processing? if(sum == 0b1101 || sum == 0b0100 || sum == 0b0
I based myself to build this circuit http://bildr.org/2012/08/rotary-encoder-arduino/ and started working it in processing 3.0 i'm "translating" the lines but the most importan ones, the ones that give me the values for the rotary encoder, keeps sending me the same error "Syntax error, maybe a missing right parenthesis?"
if(sum == 0b1101 || sum == 0b0100 || sum == 0b0010 || sum == 0b1011) encoderValue ++; if(sum == 0b1110 || sum == 0b0111 || sum == 0b0001 || sum == 0b1000) encoderValue --;
These are the lines i have problems with
`import processing.serial.*; import cc.arduino.*; PImage img;
Arduino arduino;
int encoderPin1 = 2; int encoderPin2 = 3; int encoderSwitchPin = 4; //push button switch
int buttonPin = 7 ; int ledPin = 13;
volatile int lastEncoded = 0; volatile long encoderValue = 0;
long lastencoderValue = 0;
int lastMSB = 0; int lastLSB = 0;
boolean buttonPushed = false; int buttonState = 0;
void setup() { size(600, 600);
arduino = new Arduino(this, Arduino.list()[0], 57600);
arduino.pinMode(encoderPin1, Arduino.INPUT); arduino.pinMode(encoderPin2, Arduino.INPUT);
arduino.pinMode(ledPin, Arduino.OUTPUT); arduino.pinMode(buttonPin, Arduino.INPUT);
arduino.pinMode(encoderSwitchPin, Arduino.INPUT);
arduino.digitalWrite(encoderPin1, Arduino.HIGH); arduino.digitalWrite(encoderPin2, Arduino.HIGH); arduino.digitalWrite(encoderSwitchPin, Arduino.HIGH);
attachInterrupt(0, updateEncoder, Arduino.CHANGE); attachInterrupt(1, updateEncoder, Arduino.CHANGE);
}
void draw(){
buttonState = arduino.digitalRead(buttonPin);
img = loadImage ("robotina.jpg");
if(arduino.digitalRead(encoderSwitchPin) == Arduino.HIGH){
buttonPushed= false;
}
else{
println("button pushed");
println (encoderValue);
}
if (buttonState == Arduino.HIGH) { println("back button"); arduino.digitalWrite(ledPin, Arduino.HIGH); image (img,0,0); } else{ arduino.digitalWrite(ledPin, Arduino.LOW); }
//println(encoderValue);
delay(100);
}
void updateEncoder(){ int MSB = arduino.digitalRead(encoderPin1); //MSB = most significant bit int LSB = arduino.digitalRead(encoderPin2); //LSB = least significant bit
int encoded = (MSB << 1) |LSB; //converting the 2 pin value to single number int sum = (lastEncoded << 2) | encoded; //adding it to the previous encoded value
//this is where i keep getting the error
if(sum == 0b1101 || sum == 0b0100 || sum == 0b0010 || sum == 0b1011) encoderValue ++; if(sum == 0b1110 || sum == 0b0111 || sum == 0b0001 || sum == 0b1000) encoderValue --;
lastEncoded = encoded; //store this value for next time }`
↧